


Construction Basics for Layout, Stairs & Roofs
Using Earth Bag Examples (Since it's Primarily what we do :)
This is the combination of all 3 Earth Bag Construction Basics Episodes all in one place!

Shae aka Winter_Apple
August 30, 2016
Transcript of Video
Gary: If you've been following us for the last five years, you've noticed, we haven't spent a lot of time little time on all the math and calculations. It isn't just circles, there are squares and things that need to be calculated, like stairs and roofs, all kinds of stuff.
When we started to make decisions, about what we wanted to have, earthbag was the last thing...we looked at all kinds of things. We started with straw bale, steel, and greenblock. It's a foam that you fill concrete...cob and other things. So, finally settled on earthbags. Today, I would to focus primarily on what we do on foundations to get things started, how we lay things out.
When anyone sets out to do a structure, consider where the structure is going on the property. Ten acres, hey, you got a lot space. You can put a lot of these things around. But if you have a small area, a one acre plot, how far away is it from the neighbors? How far from the fence line? How far from the pig farm that smells really bad right down the street? Also too, which way are you allowed to put structure in? You may have to have that front door pointing towards the street. That's the kinds of things you have to consider when you are plotting for your placement of your structure on your property.
Also too, you want to consider the kinds of materials you may have around your property. Things you have that are right there. If your dirt is really good, it has some clay or caliche like what we have in ours, or what's calcium...or may some rock or something that is fairly tough that you are able to build with...great. If not, you may have to haul that type of material in. Which means, dump trucks and things that you can fill bags.
As we lay out the ground, we have to think all the way through the roof. You may need some support in a particular area. Like, we use around our doors, we put in post. So we know we might be coming up to those post with our bags as we go around in the circle. So, I have to plan for that. Also too, we like to put in cleats, what we call cleats that connect. So, we can go up a few rows and come up to a window or door we have to place that cleat in. And we have to remember to do those things. So, it is nice to sit back and take a look at your spot think through that all the way through the roof...what are the next steps.
Shae: I think sometimes to have square rooms, there're nice and they have an almost neat and tidy feel to them. It seems like with the "roundery" rooms, it's more of a creative environment. It is easier to think of a good and creative ideas in a "roundy" rooms, I think.
Bryson: To have a round room, it's really unique and a lot more fun. You look up at the round ceiling and you know like...every morning...you awake and open your eyes and look at the round ceiling. It's pretty cool.
Gary: It's very relaxing for us...to be in a circle room where there aren't these sharp edges . I don't know what it is...organic or something. Wait. Are my ears getting pointy? Am I growing hair on the tops of my feet?
Now I'm not looking for a geometry lesson here on circles, but I want to cover some main points. Circles are two dimensional shapes that are circular. They have a center to a circle. Radius. Which is half the distance of a circle. That means that the distance from the outside of the circle to the inside of the circle is the same in all directions.
Diameter is from edge to edge, from outside to outside, as it passes through the center. That's the diameter.
The circumference is the lineal feet of the outside of the circle. And why it's important to us as earth baggers, that we want to determine how much bag we need to create one of our structures.
We use like 12 foot, 14 foot circles. Those are the ones we typically make the earth bag bedrooms that we make out here. Calculating the circumference is really no big secret. Just go to the Internet websites. There's just plenty of calculators out there.
Making a circle with earth bags is really easy. First you drive that stake in to the ground, leave it high enough to tie a rope or string on the top of that. Go have of that distance. If it's a 12 foot room for example it's a 6 foot radius. You tie one end to the post and one end to a stick and travel all the way around the stake with a taught circle drawing on the ground.
Now when we fill our bags, we fill our bags to about 4 inches thick. So , you have about 4 times 3, which is 3 rows, 3 rows of bags equals a foot. So that now you can calculate how tall it is. Say we want to go 8 feet in the air, you know it is going to be 24 rows of bags.
This topic can be easily covered with drawings. Let me show you
There are so many different types of stair designs to cover, let's just stick with the most common.
Most stairs are made of wood, steel, and concrete. They can be freestanding with no wall support on any sides or stairs or can be attached to walls one side or both. I like stairs that are attached on only one side with no support. These are called cantilevered. Let's cover the basics of stairs, like the foundation, run, rise, tread width, and railing
As with any structure, it must support the weight of a load at any time.
Stairs typically rest at the the top which is called the deck or the landing which is at the the bottom.
Consider placing a footing at the bottom of the landing.
The run is the horizontal distance from the landing to the deck.
The run can be split into one or more landings. It can be curved or spiral. Once the run is determined, this measurement is fixed. Adding landings can compact the foot print, but the run is a constant.
The run is horizontal, the rise is vertical.
To determine the rise, measure the distance up from the landings' horizontal plane to the deck's horizontal plane. This is also a fixed distance.
The angle from the top of deck to the landing along the run is the pitch. The pitch will determine the tread width and comfort of walking up and down the stairs. If it is too steep of a pitch, there may not be enough tread to step on safely. It may also be uncomfortable to ascend or decend the stairs. You don't want to feel like you're walking up and down a ladder.
The rise and run may also determine the headroom. How many of us have conked our heads on the deck or floor above while using improperly designed stairs. The minimum distance for safety is 6 foot 8 inches measured vertically from the top of a step straight up to the bottom of a beam, a landing or deck.
The width of a staircase should be about 4 feet or more. This is the typical egress for safety. Wider is better. Remember how much trouble it is to get the king size box springs upstairs?
A spiral staircase may only have a 2 foot width. The capital building will have steps that stretch a city block. Really, It's the size tread that matters.
Tread size is the space that your foot rest on when you place your foot on the step.
A typical tread for comfort is about 10 inches. Treads may have a nosing that allows the foot to travel under the vertical plumb down from the next step.
Handrails allow you to travel safely up or down stairs.
Most handrails have a typical distance of about 44 inches from the nose of the tread to the top of the hand railing. Stairs should have at least one handrail.
Bryson's' staircase doesn't have a handrail. We will be installing one soon. We don't want anyone falling.
Let's use an example to put all this stair stuff together.
If the run is 133 inches and the rise is 105 inches...we want 9.5 to a ten inch tread. Let me take my shoes off and count this up. We get 14 steps with a rise at 7.5 inches per step.
We've looked at basic circle design and stairs. Let's check out roof construction.
Just like the stair basics, roofs follow the same idea of rise and run. The idea is this: a pitch is created when one end of a level line is raised.
We measure roof pitches using inches in a mathematical ratio. Ya it's that math stuff again. For example, the run is 12 inches horizontal and rise is whatever your desired pitch. Let's use 6 inches vertically. This creates a triangle with a perfect square corner. And triangles are the typical geometric shape used in roof construction.
The ratio is displayed like this: 6/12. This means for every foot of the run rises is 6 inches.
Let's apply this to a roof example:
The building is 10 feet wide. This is also called a span by the way. We want to place a pitched roof equally down the center the building. To find the center line divide the 10 feet in half. The run is 5 foot. We will use the 6/12 pitch. There are 5, 12 inch increments in this run. Multiply the 5 feet, times the rise of 6 inches to create a 30 inch total rise.
We can use these triangles to create to roofs. But, how does all this roof stuff fit together?
This is one typical design for a roof.
Top plates set on top of the wall.
The ridge typically runs right down the center of the peek of a roof.
The rafter travels from the peek at the top down onto the wall.
The tail is what hangs over the wall or beyond the wall.
The birds mouth is the notch at the bottom of the rafter.
Height at plumb, also known as HAP, is the vertical distance off the top plate to the top of the rafter at the birds mouth. The seat cut, if possible matches the width of the wall and acts as a secure point to attach the rafter.
Wow. There are so many more parts to a roof. Let's just focus on the Common rafter.
Common rafters are all the same. I guess that's what makes them common.
So, how are rafters measured for length? I do recommend an online calculator to get a rafter length. But, it is always a good idea to know some of the math behind things. A rafters length is determined from the Pythagorean Theorem high is a2 + b2 = c2. I hope I haven't brought up any painful memories.
Let's do this.
The run is 5 feet or 60 inches.
60 x 60 = 3600.
The rise is 30 inches.
30 x 30 = 900 that's the B part of the equation.
3600 + 900 = 4500.
The square root of 4500 is 67.082 and of course, I used the calculator for that one.
That is 67 inches and .082 is really close to that 1/16th.
How do we set a rafter on a wall? There is a notch at the tail end of the rafter called a birds mouth. Funny name huh?
Make a mark for the HAP and another plumb cut mark going down. If at all possible, try to use the width of the top plate to match the length of the seat cut. This allows the underside of the rafter to meet the exact corner of the inside of the top plate.
Now a tail would need to be added to give a roof an eve. This is calculated by using the HAP moving horizontally out your desired eve width. Let's say 24 inches.
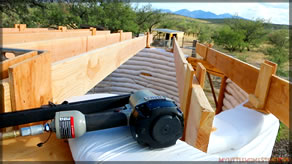
What do we do when we have an earthbag for a top plate?
The top of the bags vary in elevation and are not level. That's a typical. The roundness may not be a perfect circle. So, to overcome these problems, we use a cleat platform to attach rafters to the top of the earthbags.
This is it how it works. It functions as a regular cleat that connects bags together and it serves as an adjustable platform to raise or lower a rafter to its correct level height.
If there are professionals in your area, please consult them if you are not a professional yourself. It is just so important to have safety first and nobody gets hurt and you are always doing the right things when you are building everybody's safe.
There is a great deal more that can be explored concerning foundation layout, stairs and roofs. We are only touching the basics. If you are interested in a webinars that explore even deeper the foundations of earth bag basics. And you would like to have your questions directly in a webinar setting, there's an option available on our Patreon page. There will be a link in the description. Occasionally, I will do more of these brief videos upon request. Please let me know and comment below. That rhymes.
Shae: Our family moved from the city to country. Thanks for taking part in our adventure.
We have new videos every Friday evening. If you would like to help us out, you can like this video, share it, subscribe, or support us on Patreon. See the links in the description.

Partners
Resources
www.greenhomebuilding.com/adobe.htm
www.earthbagbuilding.com/articles.htm
www.earthbagplans.wordpress.com
We moved from the city to the country in 2005. Since then, we have been building structures, raising livestock and growing some of our own foods. We are crazy about family, nutrition and want the best for our growing family.
![]()