


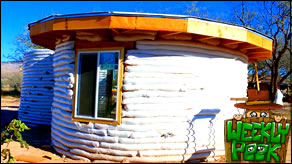
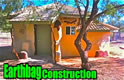
Earthbag Construction Episode 5
Roof Patio Deck
Gary spent much time researching how to design the patio roof. It has to be strong and leakproof. There are several expensive options but after talking with a professional roofer, he found an simple solution.
Watch Gary and Bryson put the puzzle together.
Watch:

Last Episode: Episode 4 - Earth Bag Walls - Click Here :)
Next Episode: Episode 6 - Conical Roof - Click Here :)
Shelly
November 13, 2015
Video Transcript
Bree: Last week we finished up the walls on
Bryson’s earth bag room.
The guys are ready to start on the roof
on the back half of the circle.
Let’s take a look.
Because we have we have a circle,
I wanted to put a design on the roof
that was somewhat circular.
So we laid out our joists like you
would on a normal roof, patio roof.
The 20 footers are for the longest
sections of the circle. You know you have
circle. So that is for the longest sections.
And then they get smaller as we go out.
Our jig that we’re going to use,
the joists will run in this direction here
for the rafters on the roof for that flat roof.
Adjust them up in down and then cleat them in.
And then when the bags lay up against them
that will give it lateral strength this way.
And then these get all pinned in on the top of the bags.
As the circle goes around, we have to change the angle
of our jigs. This is an example of an angle change.
Bree: The lumber costs for the cleats is $100.
We have straight lines running north and south.
And then we needed to have joists that go out perpendicular
to the outside put on there with joist hangers
to help support the weight.
And then there were these little jacks that went
off on a 45 from that.
Bree: The total cost of the rafter lumber is $250.
So just when we think we are done bagging,
we still have a little bit more earth bagging to do
in between each of the rafters.
The alternative to earth bags is cobbing.
And that is not any fun to try to fill it with cob.
Bryson: Like a 50 pound tamp.
Shelly: Oh yeah, it’s beautiful.
And this entire area out here is all going to be the top deck.
Since this is going to be a deck we are going to walking on,
I wanted 3/4’s inch material or 7/8ths material.
I need to do 2 bisections...
Shelly: Gary can be just be working away and he just
seems to know when it’s time to slow down
and teach the kids something.
Gary: 2 things. A square corner and bisecting,
you can split this thing up in as many segments as
you want to that are all equal.
Bree: The bill for the plywood is $250.
Pull up the plywood a bit so we can make our cuts.
Put the facia board on, reattach the plywood and
we have a segmented roof up here that is all,
almost looks circular.
Gary: This here is the center blocking that
also gives it rigidity to the roof. Looks good.
I can put like telescope things on there and
even a bed up there so we can sleep up there.
Bree: Facia is around $100.
As usual, we are trying something new.
I’m not used to a roofing material that is not like
asphalt or steel. We went to a professional roofer
and he suggested we use the 30 pound felt
and 3 coats of snow roof.
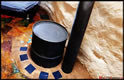
Bryson: Here’s what we are doing.
We are taking this microfiber and we’re laying it
over the creases and we’re covering it with the
white roof coat. We are putting metal flashing around
the roof. Since our roof slants this way,
each one of these overlap like a shingle.
What we’re doing is rolling this felt back
and then putting the white stuff down and
then rolling it back over it, like a glue.
We ended up doing 3 or 4 coats on it.
The expenses are low until we get to the roofing.
That’s when the costs really start to add up.
Bree: Adding in the roofing and paint supplies at $100,
brings our total of the back roof to $800.
Our running amount was $850.
Our new expenses brings our total to $1650 so far.
We’re starting the conical roof on the front circle.
We’ll bring you another update in 2 weeks.
Next week, Garen takes us on a hunting trip.
[Sniff, sniff] Is that a fire?
Bryson: Dad, are we going to put railing on this?
Out here?
Gary: No, it’s a flat roof, if you screwing around and fall off
then shouldn’t of been doing that.
Bryson: Yeah, simple as that.
Shae: Please subscribe.
Thanks for watching!
Step by Step - Building of Bry's Earth Bag Room
Full Verion - Building of Bry's Earth Bag Bedroom
Walk Thru Our First Earth Bag Construction Project!
Garen's Earth Bag Interior with Rocket Stove
Garen's Earth Bag Room - the Exterior
Bree's Earth Bag Room

Partners
Resources
www.greenhomebuilding.com/adobe.htm
www.earthbagbuilding.com/articles.htm
www.earthbagplans.wordpress.com
We moved from the city to the country in 2005. Since then, we have been building structures, raising livestock and growing some of our own foods. We are crazy about family, nutrition and want the best for our growing family.
![]()