







Underground Earth Bag Construction
Episode 9
Bottle Lights, Headers & Fixing Wall on Mus-Art Studio
Sometimes You Win and Sometime You Learn!!!
This week we had a little trouble with one of the walls but thanks to the brilliance of the guys I think we have a solution. In the meantime we are installing the bottle lights! Check the video to see what happens with the walls!! Please like and subscribe!!

Last Episode
http://mylittlehomestead.com/undergound-earth-bag-construction-reinforce-walls-window-boxes.html
Next Episode
http://mylittlehomestead.com/undergound-earth-bag-construction-ep10-reciprocal-roof-frame.html


Shae aka Winter_Apple
September 30, 2016
Transcript of Video
Bree: Last time, we shored up the window boxes and installed hangers as the walls continue to grow on the eartbag MusArt Studio.
After weeks of dodging rain storms, we finally get a reprieve. We quickly jump into work to reach the top of window boxes bags.
One of the ways to help reach our goal sooner, is to cut the top of the window boxes off.
Gary: We wanted to go ahead and shorten the top of the walls to accommodate the roof a little better. So, we have shortened our windows down from 4x5 to 4x4 windows, four foot by four foot. We decided to go ahead and drop them down one foot and that brings to whole roof down one foot. It gives us a better profile on the building. We will be able to find those 4x4 windows probably easier than the 4x5 windows. Also too, the wall height was just getting too high after we add everything on top of the windows and everything, it’s going to be skyscraper before we can get the roof on.
Shelly: This building, I just really wanted to do a lot of bottles. We had saved a bunch of bottles and I was hoping to use them but, when you put them together, I don’t them to stick out too far beyond the bags, because you have to cob around, and they kind of stick out. So, I was trying to stay real close tp the same width.
Where do you think Bry? Right there?
Bryson: Yea.
Shae: I just want to make a statement that I did not help at all with finding bottle, matching bottles, taping bottles or putting the bottle up there. But, I did bag around them.
Shelly: Yea, I realize that you really didn’t help with the bottles. But, somebody asked last time where you were. So, we had to pretend you were involved in the bottles and put you in this right now.
What?
Shae: Nothing…
Bryson: From our previous buildings we learned that with bottles, you can’t just run barb over them like normal. Because, all the weight when it starts building up, it will eventually break that bottle. So, you have to put the bottle in, bag up to it with a thin layer over the top of it and keep going. And then when you tamp, you only tamp up to it and don’t tamp on top of it until at least you get the next layer on. And you don’t lay any barbed wire like, over the top or underneath of them, you just lay them up to it.
Shelly: But I’m just kind of taping them together. What I found that really works well is to just put those two bottles together and then tape them off.
Shae: Beer bottles.
Shelly: Not beer bottles.
I kind of like this arch.
Garen: When we first started this design process and everything, dad really wanted to put in buttresses. We talked him out of it because we don’t like the look.
Gary: Well, buttresses are a device that has these very very long walls with these huge steeples. And, you just couldn’t get a long wall and a huge steeple without support. So, they began to put these things called buttresses...which were steel, brick, concrete type of frames that actually held the wall in place. Like a triangle. Then you able to support the actual steeple that sat on top of that. For us, we would have had to put them in the walls and they would have been four foot sections that continued up the side of the wall. Because we didn’t put the buttresses in, it is possible we had more problems than we would have normally had.
Garen: When you put up too many layers too fast, they never get a chance to dry and harden. It’s like a bag that can move, even with it just being damp, it allows it to move and get re-tamped. Once it gets hardened, that thing is rock solid. A thirty foot circle on a fourteen inch bag, is the absolutely max that you would ever want to do. It really is. We really didn’t know that going in, and we really didn’t figure that far…we didn’t really think it would matter because we have had such good luck with the smaller circles. And then, once we got up to a certain height, we had some issues with just setting the walls, and our center line got shorter at one point and it brought the walls in and out. Normally, that would ok, but we had some rain come through. It soaked the bags all the way through to the bottom one. It caused a lot of weakening to happen. Then it started to buckle. If we had put buttresses in, we would have had these problems.
Gary: Let’s try the simple first then go to more complicated. And it took a lot of rain. It was the worst place for something like this to happen, but it did, right there. And we started to lose a little bit of integrity on the wall.
Garen: We are suspecting that the wall was possibly moving. We took some measurements just to kind of see what might happen over an extended period of time to see if that wall really was moving. It didn’t appear to be at first but as soon as we started to get up and walking around a little bit to put more bags down, we noticed was definitely moving.
Bryson: We have discovered a bad listing problem here. So, we are going to try fix it.
Gary: We decided to use come-a-longs. So, we are at the base of the door downstairs. We were able to connect the come-a-long at the base. Run a cable all the way up to the wall. We were able to run the cable through. We put a backing on the back of that so that on the outside of the wall, we could run a cable through, back and around out to the come-a-long.
Bryson: We are going to try push entire bag section over this way.
Gary: …and then use the come-a-long to bring the wall in.
Garen: That is already a ton better. Just look at this line.
Gary: I’d go some more. It needs to be pushed in and I’m thinking you could tamp it. Then we’d move it over and tamp it down. This isn’t going anywhere. It’s got this you know.
It’s really working good Garen . Come out here and look.
Garen: We are already at 102 and half, 103. So, we are moving a lot. We have all these gaps.
Bryson: This is a stiff as this building has ever been.
Garen: …right here, so tamping it settles all the bags down that way it will hopefully stay when we let it back a little better.
Gary: Garen, come over here. Every time he hits it, it drops down.
Garen: You can really see it over here. I can stick my fingers in between the bags.
The dirt on the center bags, since we had that big rain, all the dirt is still damp. It hasn’t dried yet, So, it is going to resettle really nice. If it was all dry, the wall would get weak.
Gary: We did the very same thing on the outside, we put a hole to the inside, put a brace on that and then wrapped it around and back in. And drove stakes into the ground, put the come-a-long on. This “s” turn kind of thing was able to straighten out.
Garen: When we were doing this, one of our links in the wire were using, ended up popping. Which you...I guess...kind of always expect to...you are always kind of afraid of it, so you are careful around it. But a, it actually happened this time.
Shelly: It almost fell Gary.
Gary: It came out about 6 or 8 inches. Didn’t it?
Garen: It was like…ya…it was…. The Come-a-longs worked really good to pull the wall back to where we wanted it.
Gary: I think what it was…was a spring effect. We pulled it in…when it busted, it like whooa. …sprung out as far as it would go instead of just coming back to normal. So it went a little bit past and we brought it back in. it was just unforeseen. You can’t always… Sometimes things just break.
Garen: It is actually kind of a good testament to what the bag…how sturdy they really are. I mean, to be able to spring back like that and hang out at a crazy angle and just stop. It really is quite amazing.
Gary: Another thing is it is a testament to the cleats that are attached to the posts. Because without them, we might have lost the whole wall.
Let’s get a cleat on there. I’ll go make one if you want to tamp that over.
Garen: So, dad’s first thing was he just wanted to tamp it. And I was like, “no. I can’t just tamp a giant section. But, Later on, he did suggestion again on a smaller section and I said “No. it doesn’t work. Remember we’ve gone through this. It just does not work”. And he left to go over and I was out of ideas. Ok. Dad is gone. We can test the tamp now.
It looks better.
Bryson: It does. Oh. Please don’t bust out that window.
Shelly, Wow. Garen. Come take a look. I think you are going to like it.
Bryson: You fixed it.
Garen: Don’t tell dad how we did it. It actually did end up working….a little.
Gary: Was that hard to admit?
Garen: Yes.
Gary: How does it look?
Look at that wall. How beautiful is that?
Bryson: Better than it was.
Garen: Let’s measure it.
Gary: We got it back in and got everything pulled back together.
It seems like all the areas around the windows where we had the cleats and everything, those walls seemed to stay pretty close.
Gary: We are digging holes to set some post here to hold up our Murphy bed. So, that worked really well. We not only get post for the Murphy bed, but we also get post for the wall to help support it. They are 6x6’s we will be able to drill a hole those and same idea through the bag with some kind of plate on that side and we will have to drive it back.
Bryson: Hey. It didn’t really move at all.
Gary: That’s good.
Garen: We got it straight again and we got it to dry. And we are going to run some extra t-post in there. We are not going as high now.
Gary: …That’s what is going to help us with the security of the walls, which really is the question isn’t? When we set the roof on it, the roof won’t have any spreading effect. Another system we are going to use… We will have a roof that just sets weight. That’s all we are going to have is weight straight down. That’s all I need.
Gary: For headers we did something a little bit more simple. Instead of going out and buying 4x8’s or 4 x material, we just used 2x6’s, 3 locked together. Put some cleats on the bottom of them and we set them on top of the windows. It keeps our profile low. We get the strength you get with a header so that the roof can set over the top of the window. That worked out really well.
Garen: We ended up upgrading the header over the door. Originally we were going to double that up but then, you found the …
Gary: Ya, I found some rough sawn dimensional material 6x6.
Bryson: They are pulling in so we have to push them out. So we can put the top on so the door will fit in correctly.
Garen: We took and straightened out the wall. Pulling that section in, we actually pushed the door out of level or out of plumb. So, we had to bring that back in.
It’s not a good idea to pull that down on your face like that.
It can fall on your head.
Garen: We ended up using the old header piece to wedge that back in.
Close…so close.
We are just going to leave it there. It will keep it spread at 6 feet, that way the door will slip right in there because that could be a nightmare. The nice thing about that is again, it will make a lower profile.
Bree: It looks like we are going to have enough dirt after all. With enough to spare. We still need more to fill in with bags once we get the roof on. Speaking of which, next time we bring you an update, it will be on installing the roof for this crazy structure. As always, thank for watching and have a great week.
All: Thank You.
Shelly: I just want to apologize to Christian Matinez. The last video we had thanked him for suggesting the solid state drive for the MAC and I called him “Christina”. I’m so sorry. He is so light hearted and he laughed about it but I want to make a public apology. So, thank you again Christian.
Shae: Our family moved from the city to the country. Thanks for taking part in our adventure.
Shae: We have new videos every Friday evening. If you would like to help us out, you can like this video, share it, subscribe or support us on Patreon. See the links in the description.
Garen: Come here. You’re a good girl…
Shelly: Oh ya, you act like you like her.
Gary: I’m just surprised she came to you.
Garen: She loves me. Meow…
Garen: she’s going to bite dad.
Boo the cat: Meow
All: Yeaaaaa.
Gary: she’s going to bite you.
Garen: that was scary.
Shelly: Cute hat. Oh my god. When was the last time you combed that hair?
Shae: Hello. It’s me
Step by Step - Building of Bry's Earth Bag Room
Full Verion - Building of Bry's Earth Bag Bedroom
Walk Thru Our First Earth Bag Construction Project!
Garen's Earth Bag Interior with Rocket Stove
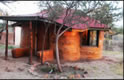
Garen's Earth Bag Room - the Exterior
Bree's Earth Bag Room


Partners
Resources
www.greenhomebuilding.com/adobe.htm
www.earthbagbuilding.com/articles.htm
www.earthbagplans.wordpress.com
We moved from the city to the country in 2005. Since then, we have been building structures, raising livestock and growing some of our own foods. We are crazy about family, nutrition and want the best for our growing family.
