


Underground Earth Bag Construction
Episode 30
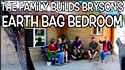
Murphy Bed Springs into Action!
Murphy Bed Plans!
So much is happening in this weekly peek! The guys launched into the Murphy bed planning and Bryson did work downstairs on the ceiling! There's also a peek into Bryson's job as a beekeeper! Check it out and join in on the adventure!
One of Many Murphy Bed Bracket Plans on Youtube...
https://www.youtube.com/watch?v=ZVc4OzHOeS8
Basic Plans for a Murphy Bed Box
http://woodworking.formeremortals.net/2015/02/build-murphy-bed/
How to Build a Top Bar Beehive
http://mylittlehomestead.com/smf-how-to-build-cheap-top-bar-beehive.html
3D Print of Queen Excluder
http://mylittlehomestead.com/smf-3d-print-queen-excluder-bee-hive-entrance.html
Last Episode
Next Episode
http://mylittlehomestead.com/ep31-underground-earthbag-home-construction-murphy-bed-design.html


Shae aka Winter_Apple
April 21, 2017
Transcript of Video
In the previous episode we finished the
walls and rail for the stairwell inside
the underground earthbag Musart studio
[music]
Dad and Garen begin planning for the
Murphy bed
Looking at Murphy bed spring design
this takes...
here's the bracket
found some things that were like springs and hydraulics
and the springs seemed to make the most sense to me
we have the materials around here
so that made it even better
and then started watching
looking
drawing
this whole section here
it's going to be right
and then we spent a couple hours
figuring out exactly what
we wanted to do
I think we got something now that'll be
it'll be really good
my brilliant son has designed a little
bracket here that will fit our situation
and trying to determine how to build the frame
give him enough depth and room to be able to put everything in
let's go three and a half inches to the edge of the bracket
59 inches
[music]
I marked out one side of our bed
where it will set
approximately within a half of an inch
There's plenty room to get on either side of the bed
[music]
cob-a-knobbing
[music]
Ellie is coming to help us out
Yah!
going to go ahead and put a can in downstairs
are you thinking right here?
I think that looks good
hey Dad
hey what?
you want to come down here for a sec
Cost you a dollar. Do you got a buck?
How does this light look?
Pretty even?
I measured each post
this is half mark here on this post
this half mark here
I measured
put it right in the center
Yeah, that's perfect.
That's absolutely perfect
that will be a nice light down here
you found me
good boy
the mirrors for down below
as someone very kindly gave to us
Thank You Pam
these are going to be awesome
they're jet mirrors
how should I attach these things?
[music]
cut this back a little bit
[sawing noise]
I think so
when we originally put the steps together
I made them all the same
forgetting that the top step needs to be shorter
to account for whatever surface you're going to have up above
[music]
it's extremely soft
it just like
it's not like you would expect
I would expect this to crack
like it would be hard
but it's not really that hard
it's actually soft
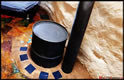
at the base of the stairs we have a solar light
which we originally put reflective foam
in
fill in with cob if you can
first of all I'm going to do is get a taller ladder
I'm going to go ahead and replace the foam
where the solar light comes in at the
base of the steps
they're more reflective than a mirror
[indistinct chatter]
hahaha
Don't look at the Sun
don't look at it directly
[music]
There is metal on here and metal on the back
kind of interesting
nothing like seeing yourself everywhere
the last melon
Ice Age quote
it's blinding
up there good enough
we're good
now we'll shut off lights and see how much brighter it is
ready?
oh wow
that is a whole ton better
yeah look it's even reflecting off the wall
it's really dirty up there but
Wow
we'll clean it before we cap it
perfect. we're done
[bees buzzing]
it's that time of year to go out and check the bees
so here's the hive
they're moving in and out
I gotta get the top off
they've filled up the entire hive
they immediately swarmed me
just like that
this is why we wear a bee suit in this area
one of the hives is completely full
really healthy
ok now this
this is a very cool frame
come over here and show you
yeah I'm pretty sure this is all honey
we can see that from here over
they've capped this much
this other half that's not been capped yet
I'm going to wait until it's capped before I harvest it
it's a very neat process
going through and reorganizing them
because I built the bars like this
but they build the comb like this
and there's only a few frames that are good
I'm going through and reorganizing the whole thing
this frame is the one I cut
a day ago
and see they built that much comb in a day
so hopefully they'll rebuild this comb
I'm keeping the queen on one side
this is my Queen excluder I put on there
that's that
I'm gonna go and put everything back now
alright so I've got them all wrapped up
I'm gonna go ahead and head back
I'm really hoping to get some good honey
[music]
this is going to be for our murphy bed
it has footprints on it
that's Garen's footprints
[music]
our table saw burned up over here
so I had another one
it needed a little bit of work
I worked on it this morning
and it's a pretty nice saw
it has extenders for plywood and stuff
which is what I need
the two little boxes that we have on
either side of the bed are designed to
be able to hold the mechanical
also in our searching around
we found somebody who had a great design
all these pieces according to the diagram
we picked up off there internet
as far as easy to build
4 sheets of plywood
to make the frame and the box
the bed portion
I cut them at seventy nine and a quarter inches long
this way
and then out of these three pieces
we'll cut that side rails
the mattresses run somewhere between seven and 12 inches
to the very pillow tops
but when you set on it you want it
you want your legs to be able to
go down over the side of the bed
so I think about a 5-inch rail
5-inch header
today we put together the box which was simple
a couple pieces of plywood
and screwed and glued
here where the end of the cabinet is going to go
take measurements about every six inches
all the way across to the wall or to my plywood
this is the bottom piece
or I'd say the right side piece
its going to go up into the right side
and it should fit right up here against the wall
and be the right side of our Murphy bed
it's got a few funky cut we need to get in there next to the cob
the cob usually comes up over the top of it
so I'm not worried about sanding it down or anything
it all gets buried
hard to make a round cut with a straight saw
[music]
we're going to do the same thing we did in my room
which is using these floor panels
as ceiling panels
inside of the base of the stairs
[music]
I can give it a little bit of
a slant outwards
like this
have it hang over an inch around the edges
drop it down here
slide it up and go
set it up there
I'll finish it next week
[music]
let's not buy any metal
I can find it
okay
I think we can get all of our metal from this right here
from our little steel...
we use scrap metal
our little scrap metal pile we have
we have it sectioned off
we found a seat swivel
for a boat
it's a six inch plate with a
nice swivel
and that's the main mechanism for both sides
and then there's an L bracket
and from the L bracket we'll attach some springs to it
and that will be it
it's pretty simple
oh nice. You split it
[music]
cut this to an 11 inch piece
is this the only flat metal we have?
If it's not 11 inches we'll just go with it
weld those two together
this guy going to go on probably the other side
it'll sit about here
[music]
it will be comfortable
[music]
these are going to need quite a bit of
cleaning done to them
we need to clean up this area with the grinder
so that it can fit evenly
right there
[music]
holes for this one
you want these holes too?
are you going to start on the end here?
then we'll go out probably four holes
and we'll go out one inch increments
check this out
you can set the depth this way
I picked this thing up for 25 bucks at a garage sale
he wanted $50 for it
I was so excited
first time I've ever used a drill press
okay here we go
oh wait wait wait
you want to go lowest to biggest
because you want to go slow as you can
oh okay
I would actually go down here first
manual speed
[music]
it's not very hot either
well good thing it's not because you're hand would be burned
oh yeah touch that
that's a good idea
we're seeing how hot it is
we don't want to like...
just an L bracket really with
a spring offset on the L bracket and
then the seat swivel will be offset as well
that way we'll get tension when the
bed's coming down
so it doesn't just fall down
and it's also easier to lift up
so that's going to go on the left side of the bed
[music]
next week we're gonna get these two hinges installed
and finish up the Murphy bed
[music]
Stay tuned for next time when we continue
building on the Mus-Art studio
we won't be having our podcast this coming Wednesday
but we will be doing our Weekly Peek on Friday
thanks for watching and have a
wonderful week
Thank You
[music]
the bees get really vicious and you flick them
I go and look back over here
and all the bees on the edges are all looking up at me
all of them
our family moved from the city to the country
thanks for taking part in our adventure
we have new videos every Friday evening
if you would like to help us out
you can like this video
share it
subscribe
or support us on patreon
see the links in the description
I don't like
I'm not sure
of course I'm sure
I'm always sure
I wake up sure
this is me sure
for sound effects
[saw noises]
in case it comes down, I want it on camera
[music]

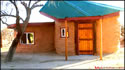
Step by Step - Building of Bry's Earth Bag Room
Full Verion - Building of Bry's Earth Bag Bedroom
Walk Thru Our First Earth Bag Construction Project!
Garen's Earth Bag Interior with Rocket Stove
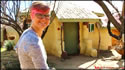
Garen's Earth Bag Room - the Exterior
Bree's Earth Bag Room
Partners
Resources
www.greenhomebuilding.com/adobe.htm
www.earthbagbuilding.com/articles.htm
www.earthbagplans.wordpress.com
We moved from the city to the country in 2005. Since then, we have been building structures, raising livestock and growing some of our own foods. We are crazy about family, nutrition and want the best for our growing family.
![]()