


Underground Earth Bag Construction
Episode 3
Building Considerations to Strengthen the Walls
Deadman, Backfill & Arch Theory
Hey! Lately we have been backfilling the wall in the studio for extra support! The wall is getting so high if you can call something that's below ground level "high". Please subscribe and share! We will see you soon!!
Missed Laying the Foundation - Episode 1?
http://mylittlehomestead.com/underground-earth-bag-bunker-laying-the-foundation.html
Missed Placing the Electrical, Moisture Barrier and Dirt Chute - Episode 2?
Available 6pm Pacific, Friday June 17:

Next Up
http://mylittlehomestead.com/undergound-earth-bag-construction-completing-the-walls.html

Shae aka Winter_Apple
June 17, 2016
Transcript of Video
Bree: Last time, we increased a few bag layers using a makeshift chute and placed the moisture barrier for the underground earthbag building.
Gary: The unique thing about living in America or probably any place in the world, is that, there is all kinds of geography. I mean that, every place has deserts and every place has rainforest. Living in a certain area requires a certain type of dwelling. Living in the desert, our geographical situation is far different than that might be in the Pacific Northwest or eastern states like New York. The make up of our ground is totally different. The amount of rain we get, we are only looking at a foot of rain compared to 25 inches or more in the Pacific Northwest. Having that much water fall from the sky to the ground makes a big difference in the soil that we get. So, we had o take these things in consideration when we were building our underground studio with the earth bags. One is...how much water do we get?, what type of soil do we have? It's a sandy has a great deal of clay in it. it has a ton of caliche, which is a calcium. So, we have kind of a hard soil. Especially that first 3 feet of out soil...you have to pick ax that stuff to get down. And then there are pockets of sand here and there. The caliche level is like the first 3 feet. We have a lot of rocks soil, a lot of clay is here to. So, it's very hard. Very, very hard not just after a rain. When Jeff came out to originally dig this hole, it was right during the monsoon season. And so, we had plenty rain out in this area. But, he got down, oh, I would say maybe a foot, and we still hadn't seen any evidence of water that was in the dirt at all. So, it was very dry. So, when we got down to the 9 foot level, we expected maybe we would see water, but we didn't see any water at that point. You know, a hundred feet down below us is where the water table is. I don't expect we are going to have any issues with water leaking in.
Bree: Now, it's time to strength the walls to ensure safety. First we backfill.
Bryson: We are just going to fill it up.
Shelly: He is awesome. Whoa.
Shae: Good boy. Yea......
Shelly: are you going to pull him out.
Bryson: Hi Diesel. Com here Diesel.
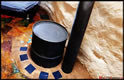
Garen: so, we're going to put in the deadman to help the walls from caving in. It might be a little bit of an overkill because of the way the bags compress on themselves, but, better safe than sorry. This isn't really that hard to do. So, I think we are just go 3 foot in. And then put another 3 foot chunk right there. T going to be one bag out, one bag over, stake a rebar, 2 to hold the two together. I even put a rebar on this side. We going to do 3: one here, we got another one over there, and then one more by the staircase.
Shelly: Are you ready for this Bree.
Bree: Ya, I'm ready.
Shae: It's kinda of interesting, we are about half way up and it feels like we are starting on the ground level again because we've backfilled around it. And our badgers are going to be able to stand on that and so are we. And so, it's kind of like being in the middle of the project but, like, having that ground level feel.
Gary: So we had to say, "how do we retain a circle in the ground?" We have some forces at work: the force of gravity, which pulls straight down, so how we fix that is our bags are sacked directly on top of each other. And we have tamped so that they are solid. So, you get the idea that if you can compact the soil, you are going to return back to the caliche or the solid packed ground which doesn't move. You can a flat wall in the ground, you are doing a retaining wall...you would have to have the wall either stacked against it so you get the pressure that don't move against it. Since it's flat, you even raise the problem of having that wall fall down down. With a circle, put the circle on is side, you get first gravity pulling down, two, we have used barbed wire to help with the shear strength, and three, just by it being a circle, it retains the same types of strength as an arch. You can actually have an arch hold its self together. Throw it on its side, any forces that come from the outside in, equally press on the circle. Like an egg, there are times you can grab an egg and if you can get equal pressure on the egg, on all sides, you can't break it. Because it all forces together similar to the arch theory.
Gary: We do let the ground settle a little bit when we are back filling. We also tamp it down, allowing it to rain or water to tamp that down. This is the butt end of a deadman that travels through the wall and into the dirt wall. Even though we get the whole circle theory going on, we certainly have the deadman for an extra measure for retaining the wall.
Bryson: Alright, we're done.
Gary: In our staircase area that circle around and up and out, we will have concrete that will actually hold this side of the wall up. So, it will make an additional amount of support. So, that is one area a force, keeping those bags straight and there is nothing that leans up against them, other than the concrete. We got a rain storm and we are putting up our bags, which will help again to help to settle behind the walls.
Bryson: It is a cool thing that this has rained because it means all of our dirt we are putting on the outside will settle nicely. That's why we put the plastic here. To help prevent it from getting too wet. These are definitely solid. They feel fine. And there same layer of squishyness on the outside because the rain hit them from the side. So, when we have our roof on, that won't get wet at all. These are definitely solid. These top ones are a little mushy, the plastic wasn't up here. But, that usually happens when you have rain. We got the dirt up to the top of the layer. All we have really been doing is laying a small layer at time and then tamping it.
Garen: It's a rap.
Bree: Catch us next time when we complete the underground bagging. Thanks for watching and have a great week.
Gary: When I was building homes back the Pacific NW, we had excavated the side of a hill out, so we could place a home in there. We were getting ready to pour concrete, and get that ready, in the side of the of the dug out area, a little stream of water popped through. This is the SW, and we don't get the holes like that of water just poking out. That s a Pacific NW thing, that is in the eastern United States, maybe Florida where they have a lot more water in the ground.
Shae: Please subscribe. For more information, you can click the website link below. If you like what you see, please share it with your friends. Thanks for watching.
Bryson: Hey.
Shelly: He likes it.
Bryson: I think he does too.
Shae: So Cute.
Bryson: Hi.
Shelly: He can't move . He can't move. Oh. There he goes. He's out.
Step by Step - Building of Bry's Earth Bag Room
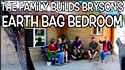
Full Verion - Building of Bry's Earth Bag Bedroom

Walk Thru Our First Earth Bag Construction Project!
Garen's Earth Bag Interior with Rocket Stove
Garen's Earth Bag Room - the Exterior
Bree's Earth Bag Room

Partners
Resources
www.greenhomebuilding.com/adobe.htm
www.earthbagbuilding.com/articles.htm
www.earthbagplans.wordpress.com
We moved from the city to the country in 2005. Since then, we have been building structures, raising livestock and growing some of our own foods. We are crazy about family, nutrition and want the best for our growing family.
![]()